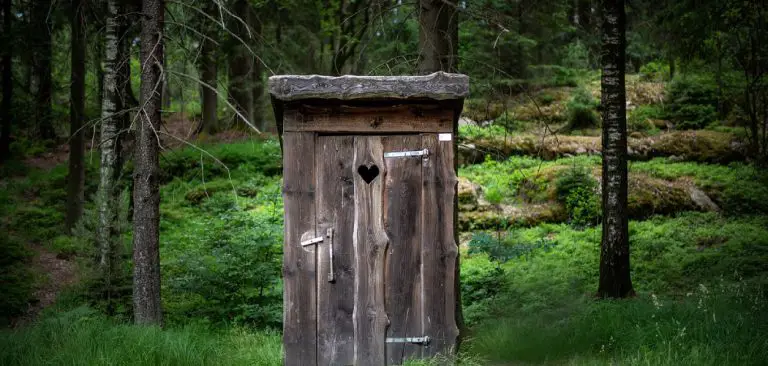
How to Build an Outhouse With a Flushing Toilet
If you are thinking about the concept of an outdoor toilet, you have come to the right place to get the a-z solution on building an outhouse with a flushing toilet. After all, not everyone wants to return home to use the restroom – especially if you are busy or working in your garden.
If you host frequent outdoor parties or want to work in your backyard, an outdoor toilet can be the perfect addition to your garden when you spend a lot of time outside in the garden or backyard.
Do you plan to build an outhouse toilet? Ask yourself and consult with other family members regarding the matter first with the following questions: Did you make a decision? Is it really needed for you? Do you think it is useful and necessary? If so, this guide is for you! This article will show you how to build an Outhouse using a Flushing Toilet.
If you have been plagued in your mind about outhouses, give up all tensions and concentrate on the article. We will explore everything you need to know about outhouse buildings with flushing toilets.
This project is easy to follow and will give you a functional toilet that you can use in your backyard or garden. You’ll have a stylish and practical toilet by following these simple steps. So why the delay? Get started today! Before starting, you have to gather overall knowledge and be an expert on it through this article.
What Kind of Wood Should You Use for Your Outhouse?
There is no one-size-fits-all answer to this question, as the best wood for an outhouse will vary depending on the climate and geographical location, customs, and traditions. However, some of the most common woods for outhouses include Cedar, redwood, and pine. These woods are strong and weatherproof, making them a good choice for locations with a lot of rain or snow.
Additionally, these woods are environmentally friendly as they do not produce much waste. Especially, Cedar is a popular choice due to its odorless nature and ability to resist rot and pest infestations. While choosing the right wood for your outhouse is not rocket science, it is important to consider the factors mentioned below.
Complete Step-by-Step Instructions On How To Build An Outhouse With A Flushing Toilet!
Outhouse Plan:
The first thing you need to plan is what you will build, such as the model, the shed, the wall, the design, the budget, and how many options your plan has even incorporated into the building material.
If you choose a structured wooden outhouse, you can build one without much effort and minimum investment.
If you read all the 15 steps below, hopefully, you will be able to build an outhouse according to your plan.
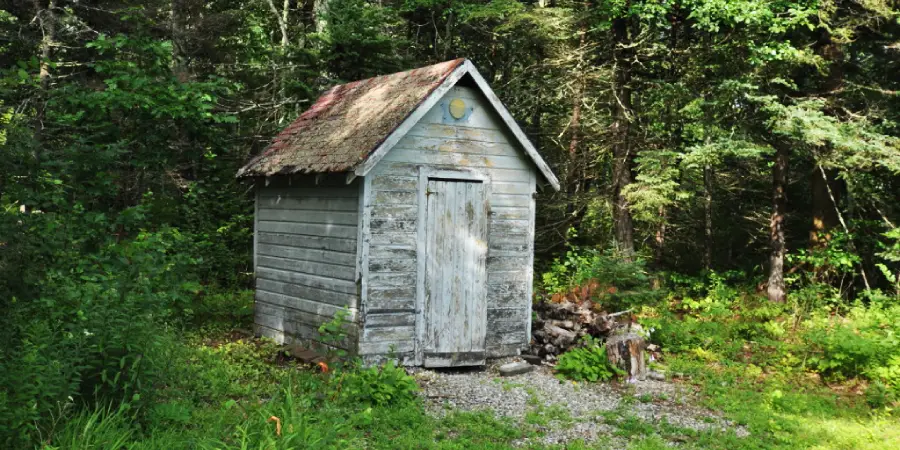
Step 1: Choose a Design
Before you start building your outhouse, it is important to choose a design. You can choose to build an existing outhouse style or create your unique design.
If you’re looking for inspiration, check out some popular designs over the internet. Some examples include barrel-shaped toilets, European-style porches, and American flag toilets. Whatever design you choose, make sure that it looks practical and stylish in your backyard or garden.
Step 2: Choose Location
Determine the location where you want to build your outhouse. If you are building it on your property, choose a spot that is sheltered from the weather and has adequate soil support. If you are constructing it in a remote area, ensure access to water and proper drainage.
The outhouse space should be at least 60 feet away from the house; it will eliminate many kinds of problems. Again, building an outhouse should not be too far away too.
Be sure that the place where you want to build an outhouse toilet should be higher than the surrounding surface or make the point high with the dug soil so that the rainwater does not ooze down to the pit.
Step 3: Gather Supplies
Now let’s gather the supplies that you will need for this project.
You will need wood for the frame of the outhouse:
- Screws,
- Nails,
- Mortar,
- Hammer,
- Measuring tape,
- Scale,
- Jigsaw,
- Drill Machine and Drill bits,
- Bolt and nut ( for more strong),
- Spade,
- Carpentry pencil,
- Spirit level,
- Shovel.
More toilet seats (with a flushing system) require a drum or mini water tank to be kept ready.
Step 4: Build an Outhouse Pit
Before you start constructing your outhouse, you will need to excavate a hole in the ground large enough to fit the wooden toilet base frame or box. Use a shovel and spade to make a deep hole, taking care not to damage any plants or soil.
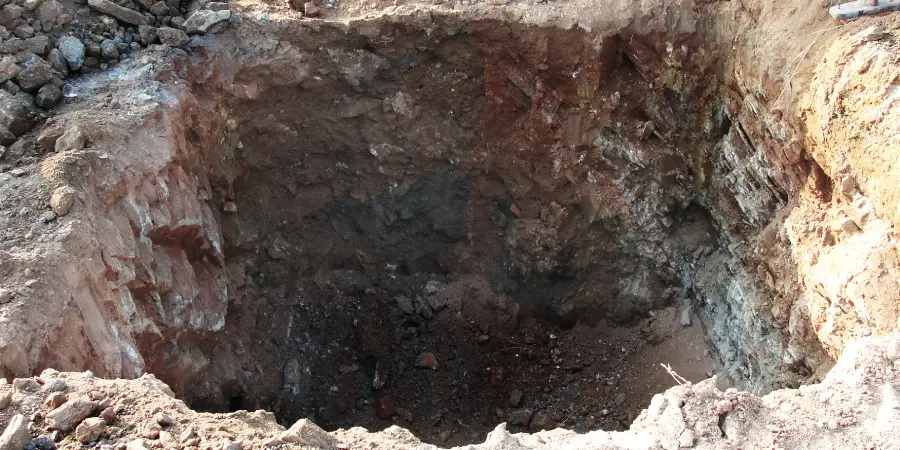
Once the hole is ready, carefully remove all dirt and unwanted roots and waste (if any) from around the place using a hoe or shovel. A single Outhouse pit dug for human waste disposal typically measures around 3 or 4 feet wide rectangular or round in shape, and its depth would be at least five to six feet. You can choose different sizes depending on how many people use them.
Step 5: Build the Outhouse Foundation
It would be best to build a foundation on the outhouse pit on which your outhouse will stand firm. Here, we are showing a single measurement as an example for your understanding, and in the same way, you can build any other sizes you need.
Example: You need to create a 4*4 feet box-like structure that is a little bigger than the pit hole (as shown in the picture below) in an average of 1 to 1.5 feet extra. This frame should be placed parallel to the ground. It is important to ensure that the structure is strong enough for sustainability.
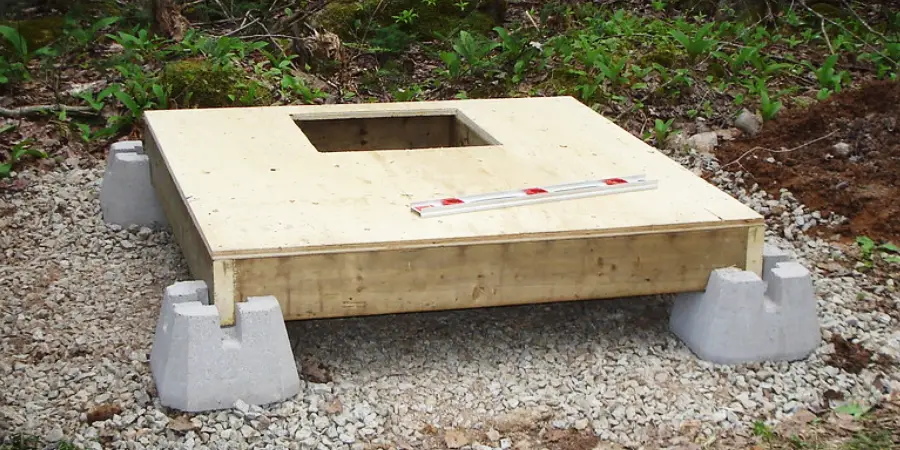
If you build for a short period, place quality polythene on the mud surrounding the pit hole under the wooden frame or box. Remember, polythene must be bigger than the slab so that it can protect the wood from any damage.
And the other hand, if you set an outhouse toilet for a long time, you may apply mixed concrete (cement, sand, and stone cheap) to surround the pit hole where the base wood frame edge sits on it instead of polythene. In that case, the pit hole size and depth would be bigger.
Step 6: Measure and Cut the Wood of the Structure
Measure and cut the timbers according to their size, width, and length that fit the outhouse toilet structure you desire. According to your plan, gather all the parts of the frame and structure near the place together.
Next step, you need to measure the timber for the outhouse structure. For wooden poles
7 feet long timbers 5 by 5 inches (8 Psc) and for rectangular joints with the poles
4 feet long timbers 5 by 5 inches (8 Psc)
Arrange plank for surrounding enclose according to the measurement and lumber for the door along with hinges and screws.
Step 7: Assemble the Structure
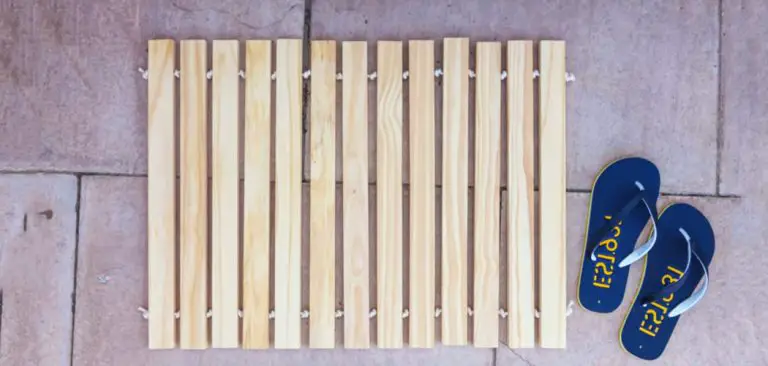
Start by constructing the frame or box of your outhouse using wood pieces and plank that make 4×4 square feet, and the ceiling height would be 7 feet. Make sure to screw the boards together tightly to create a sturdy structure.
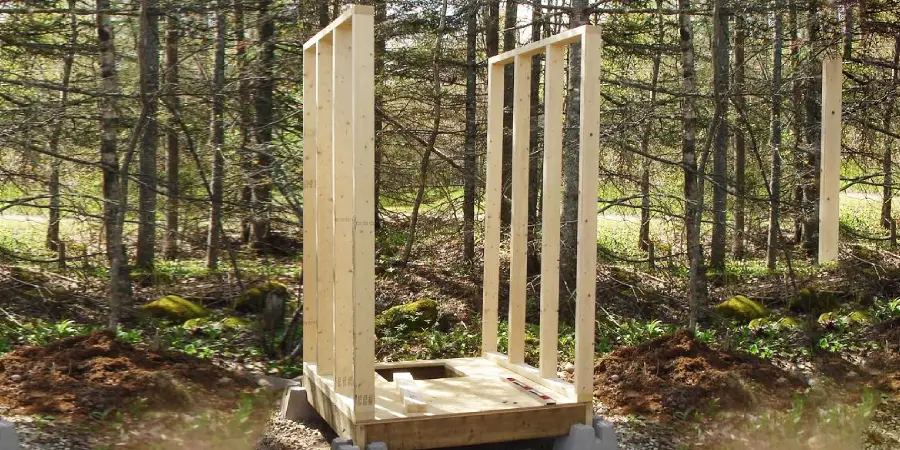
Assemble wooden poles in four corners of the floor slab box and put one in the middle of every two poles after making holes to fit with pole size, and that will be 8 nos. of wooden poles on four sides. Make sure the alignment and level adjust with the slab box frame. The poles fix with bolts and nuts; you can use nails to the box frame. (as per picture).
Step 8: Floor Ready
The floor needs to be set up once the surrounding structure is done. Make a wooden board-like floor the size of the rest of the outhouse base and place it on top of the base frame box. So that it can be removed when necessary, such as during cleaning the outhouse, the wooden toilet slab would be very simple and easy to remove without touching the main structure in this procedure.
So, the main structure will remain as strong as before. There would be two parts 1. Frame box and 2. Plain slab. Commode or pan sit on the plain slab’s hole.
Do not use nails or seals to place the floor slab on the wooden frame or box. Because when the Outhouse Pit is full, you can easily loosen the floor slab and clean it without deforming the outhouse structure.
Step 9: Make the Roof
You can use an asbestos or galvanizing roofing sheet on the roof on a low budget. When laying the roof over the outhouse, try to keep a slight slope at the back. Use an extra piece of wood on the front, or cut the timber accordingly so that the front ceiling rises to 6 inches more than the back.
Step 10: Outhouse Enclose
For covering the open sides of the outhouse, you can use lumbers or plain steel sheets and plywood fixed with the surrounding poles by nailing. Steel sheets and plywood are available in the hardware shop near you.
It would be best if you planned to provide privacy for your outdoor toilet, and be sure to work it out at the planning stage. This plan may mean choosing a frozen window or making sure to lock the door.
Step 11: Make Ventilator
It is very important to make at least two ventilation for air movement that helps remove odors and outhouse smell easily. If you have power supply access to your outhouse, you can install an exhaust fan to keep your fresh toilet odor-free.
Step 12: Build Outhouse Door
Every outhouse must require a door for safety. You can make a toilet door with lumber or steel plain sheet or plywood with a hinged shutter to lock from inside while using the toilet. It also protects insects from coming in. This type of outhouse toilet door making is easy and cost-effective.
Step 13: Install Water Supply for Flush Mechanism
Now you have to arrange a water supply for your flush toilet. It would be best to have a water reservoir Where the supply water will be stored. On the other hand, you can use a water tank or drum near the outhouse.
My suggestion is to make a separate stand next to the outhouse for the water tank or drum whose height would be significantly more than the toilet flushes tank position; this would be the best method so that the water can pass into the flush tank quickly without interruption. Remember, water speed depends upon where the water pours.
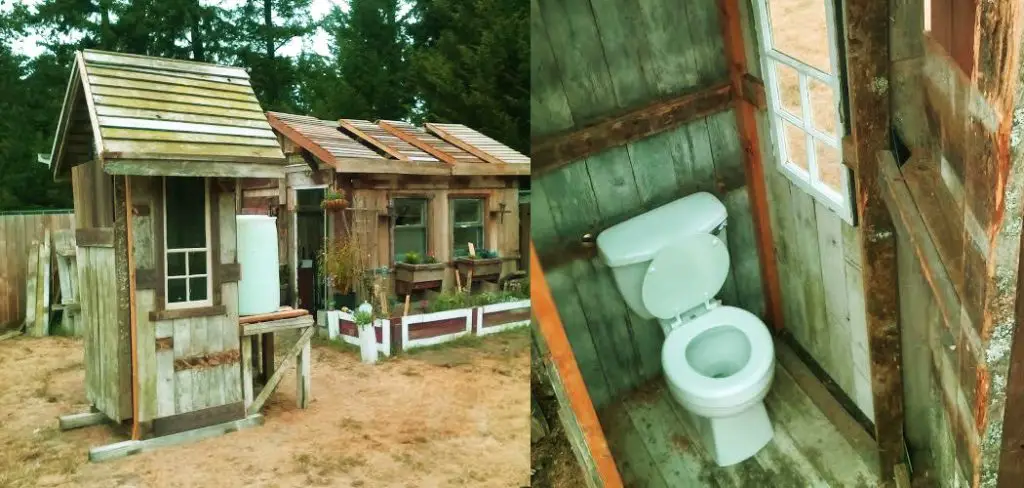
Step 14: Install a Toilet Seat
Installing a toilet seat on a wooden floor of the outhouse is easy and simple. It would help if you bought a commode with a flush tank and required accessories that fit your toilet. Then bring it to the outhouse and place it on the slab hole that you made before.
Then, tighten it with the bolt and nut supplied with the commode. Install the commode seat cover and the flush tank. If it is confusing, see the installation manual supplied with it.
At the end of the task, you need to connect the waterline with the flush tank, which is come from the reservoir, and open the lock of the waterline. Check the water flow in the flush tank. When the flush tank is full, flush the water once for confirmation. If it works well, you are done.
Step 15: Add Interior Finishing Touches
You can do some crafts inside it for comfort like painting, varnish, etc. There is something to set up inside the outhouse like a towel rail, tissue holder, hand push cleaner, and even can keep a simple tool for sitting if required.
Usually, an outhouse is made with a simple design. So, you do not do anything that is cost-effective. If you enclose the outhouse sides with glass, you need to affix a screen or curtain for privacy.
FAQ’s
Do I Need to Seal My Outhouse Toilet, or Can I Leave It Open?
Frankly speaking, it is good to seal your outhouse to prevent insects and other critters from entering. This method can help reduce the chances of getting sick, and it can also help avoid potential damage to your property.
If you use a traditional outhouse, you can leave it open with a curtain. However, if you use a septic tank system, you will need to seal it to avoid the backup. Additionally, if you are using an outhouse not meant for human use, you will need to ventilate it regularly to prevent smell and insects.
What Happens to the Poop in an Outhouse, and How to Get Rid of the Problem?
Human feces can spread bad smells and diseases if not well built and maintained properly. Poop from Traditional outhouses contaminates groundwater.
Once the hole above is filled, it should be emptied or made into a new pit. If the outhouse is designed as movable, the shelter should be relocated or rebuilt to a new location.
Even you can use it as fertilizer after composting.
How Do You Dissolve Poop in an Outhouse?
A well-known home remedy is used to treat outhouse poop, such as quicklime and hydrated lime, which that broken-down human biological organic waste for more than 100 years. Many people used wood stove ashes or a bucket of lime to keep inside the outhouses even scattered those items after every use to reduce insects and nasty odors.
The vinegar and baking soda mixture start fizzing and bubbling immediately and shows its magic in twenty minutes. People also sprinkle lye in the holding bowl after using the outhouse. Normally, stools take about a week to dissolve, but stools can dissolve within 30 minutes using natural biodegradable enzymes.
Do You Need to Vent an Outhouse?
Sincerely speaking, you will not need to vent an outhouse because there are enough gaps in between the roof and encloser, even at the bottom if it is made of wood. But, if you construct with rod, brick, sand, and cement, the vent is mandatory.
How Big Should an Outhouse Be?
A typical outhouse should not be more than 4 to 6 feet long and 4 feet wide because it is made with wood usually.
How Long Will an Outhouse Last?
It depends on various factors, including the type of outhouse, how often it is used, and how well it is maintained. It also depends on how strong lumber is used for the structure. However, assuming good care and regular use, most outhouses should last around 10-15 years.
How Far Away Should an Outhouse Be?
Ideally, outhouses should be at least 60- 80 feet from any occupied structure.
How Cheap Can You Build an Outhouse?
You can build an outhouse for less than $100.
Conclusion
If you’re looking for a quirky DIY project with your friends or want to share your hilarious experience building an outhouse with a Flushing toilet, look no further! By writing down your thoughts and experiences in the comments below, you’ll help others who are interested in building this unique structure. Have fun!