How to Build a Portable Shower Trailer
Shower trailers are becoming more and more popular for outdoor camping and family trips alike. The benefits of owning a shower trailer are pretty significant, especially when traveling long distances.
It can be used as a way to get clean at your campsite or as a way to stay clean for days on end while you’re on the road. When it comes to building a shower trailer, there are several different methods that you could take.
We have discussed ‘how to build a portable shower trailer with authentic information and multiple choices as well. If you intend to build a portable shower trailer then read this essay carefully. We are sure you can do it very easily although it will take hours or days.
What Is a Portable Shower Trailer?
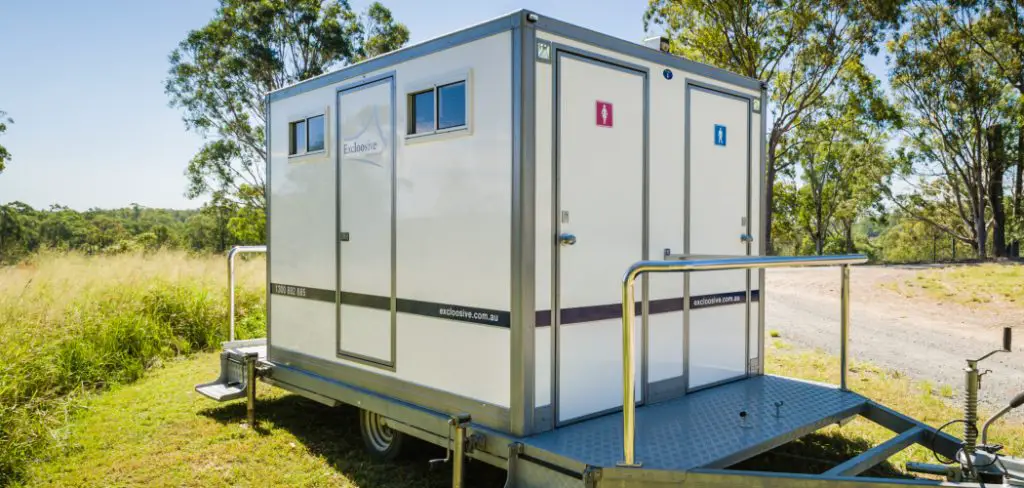
A portable shower trailer is a small temporary outdoor structure that can be set up to provide a short-term place for people to shower.
Some of the benefits of having this type of unit are:
- It provides a quick and easy way for people to take a shower on the go.
- It is easily transported from one location to another, making it easier to set up at different locations.
- It does not require much space or cost too much money because it can be folded up when not in use.
Step by Step Guide on How to Build a Portable Shower Trailer
Step 1: Purchase or Acquire Sufficient Materials for the Structure
A trailer is an excellent example of what can be used. However, you could also use plywood to create something suitably sized and with sufficient height.
Depending on how convenient it will be, consider using aluminum ductwork to make a frame more efficient.
Step 2: Gather Tools Needed to Complete Projects
Necessary Hardware tools and accessories, including a saw to cut wood, screws, and nails. Time saver: Get your friends together for help when it comes time to assemble the frame.
Step 3: Buy or Construct Your Shower Head Unit
Direct connections can be used with pipes for water pressure to work effectively without clogging up the bathtub drain of fixtures. Alternatively, you could choose a garden hose as well so that water can be siphoned right up before it finishes draining.
Your local hardware store will have fittings to ensure this happens as well, with a sink at the bottom of your trailer that extracts all excess water from there as well when finished.
You may need to achieve these by building some form of structure for a pipe and fitting system to work effectively on an angle going down. If you use pressure, consider using valves so that excess pressure does not leak out.
Step 4: Assemble Frame and Other Necessary Appendages
Your local hardware store should have PVC pipe of different sizes available, as well as fittings to make up a structure that can be taken apart and then carried around effectively. You could even purchase plastic or steel pipes if this is something you would like to do with it heftier rather than PVC piping (you will need more fittings for steel or plastic piping)
When assembling the frame, make sure that it is sturdy and secure. For this, you will need screws to hold everything in place securely. Make a platform on your floor if needed so that all your screws have something to build into with every step along the way of connecting pipes and wiring together.
If using pressure: Consider having a valve attached off one pipe near where water may be coming out to stop any flow back into your frame’s other pipe or have a tap near where water will be running so that excess flowing water can go straight out.
Step 5: Connect All Pipes and Wiring Together
Depending on the size of your trailer and the amount of work you want to be done, this process could take hours or days – depending on how well-prepped ahead you are. When connecting pipes for foam filtration, make sure you hear the initial “snapping” noise as the connecting ends and joins together.
If it does not move freely when connections are made, one of them is probably loose – which can cause a mess when filling tanks with RO or Boil Water Rinse Solution.
To wire your trailer: A common electric source for DIYers might be something like a 120v outlet in their garage at home that they could use to wire the whole trailer.
If connecting your feeder, consider buying a commercial-grade pump. Using these pumps will ensure that they are more reliable and easier to work with than lower quality residential pumps, which might break down over time due to their poor construction design.
Step 6: Clean Up and Set Aside for Final Touches
Use a clean, wet rag to wipe down machinery and walls of your trailer.
Place all items you used for the project in a large container that won’t hold water or fill with dirty residue from dirt. Consider using an old pot, as discussed earlier.
FAQ’s
Which One Is Better: DIY or Professionally Built?
This is a difficult question to answer because the answer depends on what you want. If you are looking for something that will last a long time, then DIY would be better as it is cheaper in the long run.
However, if you are looking for a quick fix and don’t mind spending more money in the short term, then professionally built is better.
Which One Is Better for a Portable Shower Trailer: Aluminum or Fiberglass?
Another difficult decision to make is which construction material you should use – aluminum or fiberglass. Both of these materials are strong and corrosion-resistant, but both have advantages as well.
Aluminum is heavier than most modern lightweight composite structures used for bathtubs and RV trailers with shower areas (usually about 3-4 times the weight), so there may be a comfortability factor involved in changing around side brackets when installing an aluminum unit for portability purposes only.
However, aluminum sheds no water when used in an operating shower and is inexpensive to ship. Fiberglass on the other hand gets pretty wet inside during showers if more than only a few drops of water come into contact with the material.
It can be easily cleaned back off, but it will not retain its waterproof quality after washing, which means that you would need to find another solution for these moisture issues (usually related to either backflow or plumbing problems).
How Much Does a Portable Shower Trailer Cost?
Portable shower trailers are an excellent option for those who need to stay on the go. The cost of a portable shower trailer is usually between $900 and $3,000.
How Much Does a Portable Shower Trailer Weigh?
Weights range from around 100lbs up to 800 lbs, depending on the trailer, its size, and design. Most mobile shower trailers weigh between 350-425 pounds (but can be heavier than that).
What About Locations for Portable Showers?
Typically the best places for portability are RVs with slider doors or covered porches. If you need your caravan nearby, but at a decent distance from other campers then it is advised not to move the trailer to a place with direct access back onto the RV site as it will pose an obstruction at times.
Also when installing in your home, you need to maintain good planning by considering things like bathroom extensions or extra toilet areas so that our shower unit can still fit through all doors easier especially if these are relatively large and solid surfaces.
Conclusion
In conclusion, your family will enjoy the best of both worlds when you invest in a portable shower trailer. You can go camping with all your friends and family, enjoying nature and the great outdoors without feeling like you’re missing out on some of the comforts of home. Investing in a portable shower trailer is an investment that will have you coming back to camping time after time!
If you face any questions while working on it, please leave your comments feel free.
RV Toilet Related: How to Deep Clean Thetford Cassette Toilet
More – DIY Camping Shower Floor