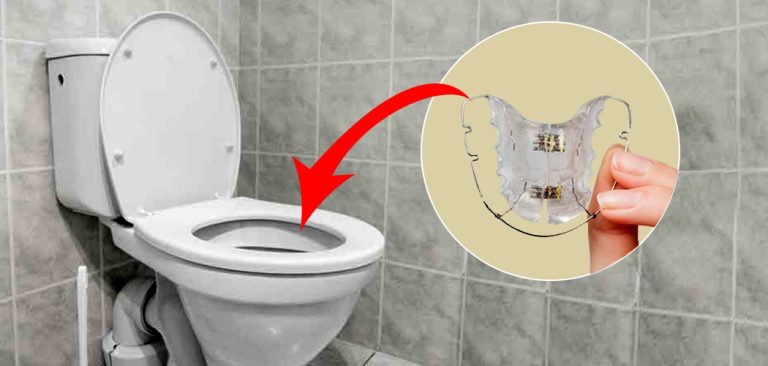
How to Remove Toilet Seat Plastic Bolts
I recently ran into this problem when attempting to remove my toilet seat and found the hard way that I needed the right tools for the job. After much trial and error, I finally figured out the best way to remove the plastic bolts without damaging them or the toilet seat. I will explain how to remove toilet seat plastic bolts in this article correctly.
Why Remove The Plastic Bolt From The Toilet Seat?
Seat Cover Change
If the toilet seat cover needs to be replaced due to damage, Fragile, discolored or for aesthetic purposes, the plastic bolt must be unscrewed in order to remove the old seat cover and install the new one.
Getting Loose
The plastic bolt on a toilet seat can become loose over time due to wear, which can cause it not to work correctly. Therefore, it is important to remove the plastic bolt and replace it with a new one in order to ensure the toilet seat operates properly.
How to Remove Toilet Seat Plastic Bolts
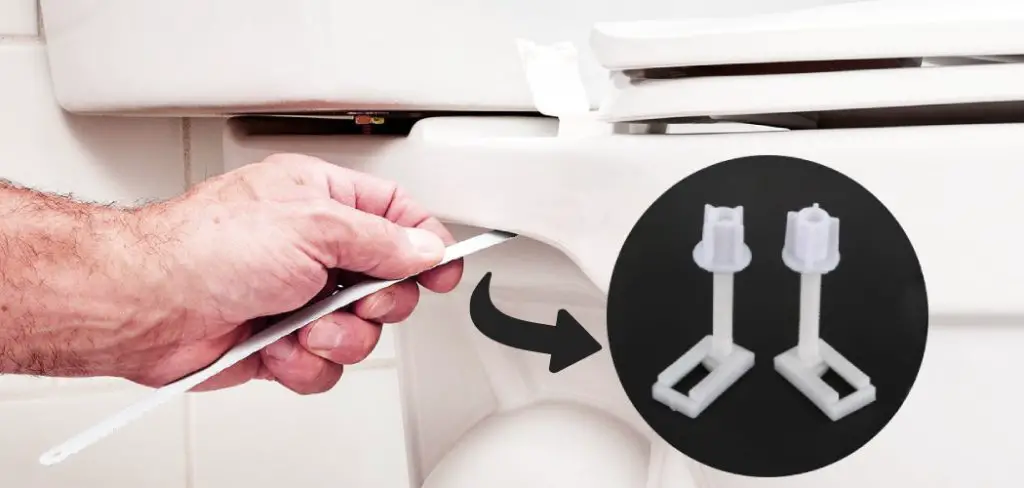
If The Plastic Bolt Is In Good Condition
If the plastic bolt is in good shape, it can be opened easily by following the given steps:
- Locate the plastic bolt at the back of the toilet seat.
- Use a flathead screwdriver to carefully pry the plastic bolt open by inserting it between the two pieces of plastic.
- Carefully twist the screwdriver to open the plastic bolt and remove it from the toilet seat.
- Repeat the same process for the other plastic bolt.
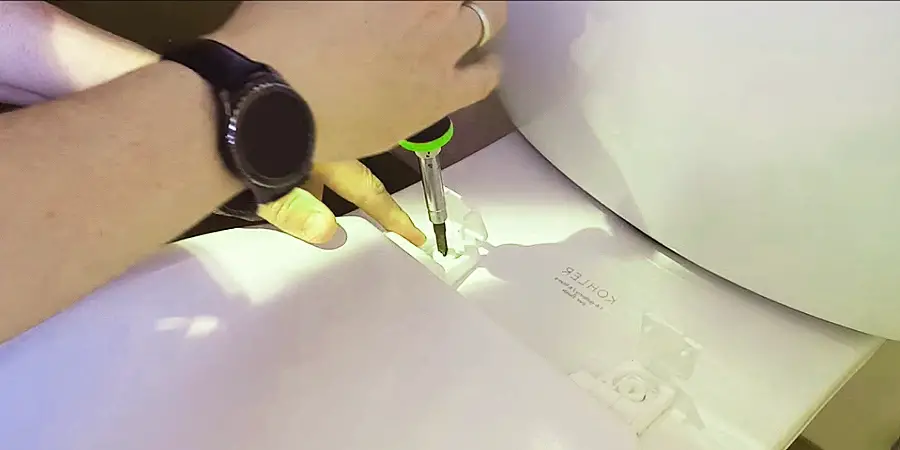
If The Plastic Bolt Is Damaged (3 Methods)
1. Use a drill
One effective way to remove plastic bolts is by using a drill. Choose a drill bit slightly smaller than the bolt and drill into it, which will create a hollow space inside and loosen the threads. Once the nut of the bolt is loosened, you can remove the bolt by hand.
However, it is important to be careful not to cause any damage to the toilet seat during the drilling process. This method is fast and simple, but proper caution should be taken to ensure the safety of the toilet seat.
2. Use Dremel Tool
Drilling a hole in plastic bolts can be done perfectly using a Dremel tool equipped with tungsten carbide cutters or Broca’s Cortadoras drilling bit. Alternatively, you can cut the head of the bolt with the same tool.
3. Use Soldering Iron
If the head of a plastic bolt has been broken, a soldering iron can be used to create a spot in the plastic where a flat screwdriver can be inserted. With the help of the screwdriver, the counterclockwise of the broken plastic bolt can then be easily turned.
What Not To Do
1. Pliers Or A Wire Cutter
I got the suggestion to remove the plastic bolt with pliers. However, the use of pliers or wire cutters could damage the toilet seat, so use them at your own risk.
2. Using Lighter
My friend attempted to use a lighter to remove the toilet cover, but the heat from the lighter caused the plastic of the cover to melt, necessitating the replacement of the old toilet cover with a new one.
3. Chisel
Don’t even think about using these tools to try and remove the plastic bolt – a hard strike could easily crack or break the toilet seat! I came across this warning from someone on a forum site, so it is best to avoid this method.
What Precautions Should Be Taken While Removing?
- Always wear gloves and safety goggles to avoid injury or accidents when working using tools and materials.
- Be careful not to damage the toilet seat while drilling or cutting the bolt.
- Take extra precautions when handling power tools like drills, dremel, and soldering irons.
- If the bolt is stuck, try using WD-40 or a lubricant to loosen it before removing it.
FAQ
Is It Possible to Break the Plastic Bolt of the Toilet Seat?
Although a plastic bolt does not rust, it will become brittle over time and start to erode. As a result, attempting to open it could cause it to break.
Conclusion
I have done my best and comprehensively explained how to remove plastic bolts from a toilet seat. If you have any questions, please let me know, and I’ll try to answer as soon as possible. Also, please share this article with your friends so they can benefit from it!
Read Also – How to Remove a Stripped Screw From Toilet Seat