How To Remove Ceramic Towel Bar From Tile
If you’re considering removing a Ceramic Towel Bar from tiles, you’ve come to the right place. In this article, I’ll guide you through the process with valuable insights from my experiences. You’ll learn step-by-step instructions on effectively removing the Ceramic Towel Bar from the tiles, ensuring a successful and safe removal. Let’s get started-
Put Safety First
During removal, it’s crucial to prioritize safety. Of course, wear safety goggles and gloves to protect yourself from other hazards.
Additionally, place a towel or cloth under the towel bar to catch any falling debris and safeguard the bathtub or other fixtures from damage. Wearing work boots is also recommended to protect your feet from any potential residue that may pose a risk during the removal.
Pursuance of these safety precautions will help ensure a smooth and secure removal process without harming yourself or your surroundings.
3 Methods To Remove Ceramic Towel Bar From Tile
Method 1: Using Screwdriver, Prying Tool and Hammer
This method is commonly employed, but it is crucial to proceed cautiously to avoid damaging the Ceramic Towel Bar. To ensure the bar remains intact, follow these steps carefully:
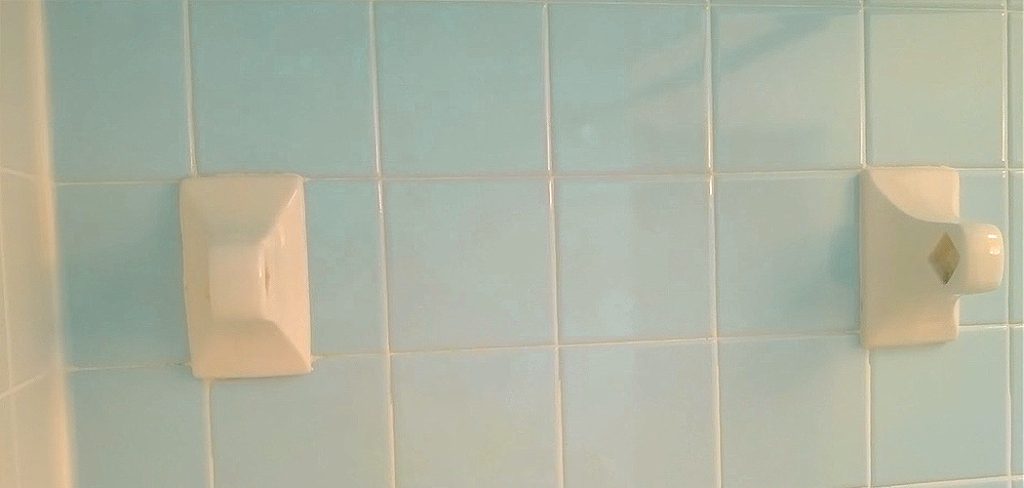
- Ceramic Towel Bars are typically installed using adhesive, caulk or grout, causing them to adhere firmly to the tiles. Begin by separating the bar from the tiles.
- Use a hammer and screwdriver to gently tap around the Ceramic Towel Bar Holder, cracking the tiles in the process.
- Now, position the Pry Bar in the crack and tap it with the hammer, allowing the sharp end of the pry bar to slightly penetrate the tiles. Repeat this process on all four sides.
- With the Pry Bar, gently insert it between the broken tiles on each side and apply gradual pressure. It will cause the Ceramic Towel Bar holder to come loose and lift.
Repeat the same procedure to remove additional towel bars following the same steps.
Remember to take your time and exercise caution to prevent accidental damage to the Ceramic Towel Bar during removal.
Method 2: Using Rotary Tools Cutter
This method is straightforward; follow the steps:
- Carefully cut the tiles around the ceramic towel bar holder using a rotary tool with a cutting attachment (or a grinder). It cuts at a 45-degree angle to create space between the holder and the tiles.
- Insert a prying tool into the cut gap and apply gentle pressure to create space between the tiles and the towel bar holder.
- Gradually pry the towel bar holder away from the tiles using the gap you created. Work carefully to avoid any damage.
Done-
Method 3: Just Broken All
While the previous methods focused on removing the Ceramic Towel Bar while preserving it for potential reuse, this method involves breaking the bar and tiles. It should only be considered if you have no intention of salvaging the towel bar or if it is already damaged beyond repair.
In this method, you must continue tapping the ceramic towel bar holder with a hammer until everything is broken and the bar is separated from the tiles. If the ceramic towel bar or tiles get damaged during the removal process, don’t worry, as you have the option to either install a new ceramic towel bar again or fix the area by installing new tiles in its place.
FAQ’s
What Should I Do with the Tile Area After Removing Ceramic Towel Bars?
After removing the ceramic towel bars, you have a few options. You can fill the areas with mortar or grout, install a new ceramic towel bar, or lay new tiles if necessary. It would be best if you got the option that best suits your preference and bathroom’s needs to complete the renovation or replacement process.
How Long Will It Take To Remove Ceramic Towel Bars From Tile?
Removing ceramic towel bars from tiles can typically be completed within half an hour if you are experienced in DIY work. However, it is advisable to take your time and proceed carefully to avoid causing any additional damage.
Conclusion
With the information provided, you should be able to remove the Ceramic Towel Bar from the tiles like an expert. If you encounter any difficulties or wish to share your experience, feel free to leave a comment. Additionally, please help others by sharing this valuable information with them. Thank you for taking the time to read the article, and I hope it proves helpful in your DIY endeavour. Happy renovating!
You may read also – How to Remove Ceramic Soap Dish From Tile Wall

